1. DOCTYPE
<!DOCTYPE html>
<html lang = "ko">
  <head>
    <meta charset = "EUC-KR">
    <title>제목</title>
  </head>
  <body>
  </body>
</html>
- doctype
- 문서 유형을 지정
- html문서이고, 어떤 유형을 사용했는지 알려 웹브라우저에서 그에 맞게 해석하게 한다
- html lang = “ko”
- lang 속성을 사용해 문서에 사용할 언어를 지정
- 언어표기를 하지 않으면 검색사이트에서 언어를 제한, 검색이 되지 않는다
- head
- 브라우저에게 정보를 주는 태그
- 화면에는 보이지 않으며, 브라우저가 알아야 할 정보를 입력
- 문서에서 사용할 외부파일 링크
- title
- meta
2. 글자 태그
- 웹페이지에서 가장 많은 비중을 차지하는 태그
- 주석 :
제목 / h
- h태그
- h1, h2, h3, h4, h5, h6
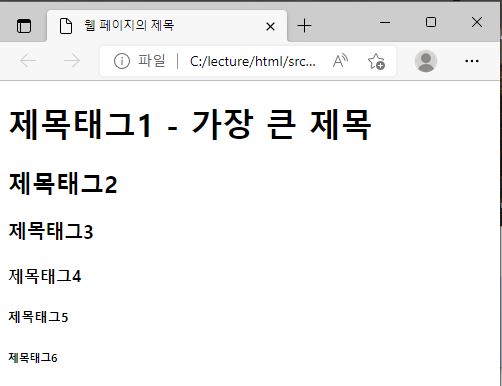
- h는 header를 의미, 각각의 숫자는 크기 및 우선순위를 나타낸다
- h1 : 큰 제목, h6 : 작은 제목
<!DOCTYPE html><!--문서 유형을 지정-->
<html lang = "ko"><!-- 문서에서 사용할 언어 지정-->
<head>
<!--문서정보를 지정-->
	<title>웹 페이지의 제목</title>
</head>

<body>
<!--실제 화면에 보이는 문서 내용을 입력-->
	<h1>제목태그1 - 가장 큰 제목</h1>
	<h2>제목태그2</h2>
	<h3>제목태그3</h3>
	<h4>제목태그4</h4>
	<h5>제목태그5</h5>
	<h6>제목태그6</h6>
</body>
</html>
<!--주석-->
본문 / p
- p태그
- paragraph의 줄임말
- 하나의 단락을 만들 수 있다
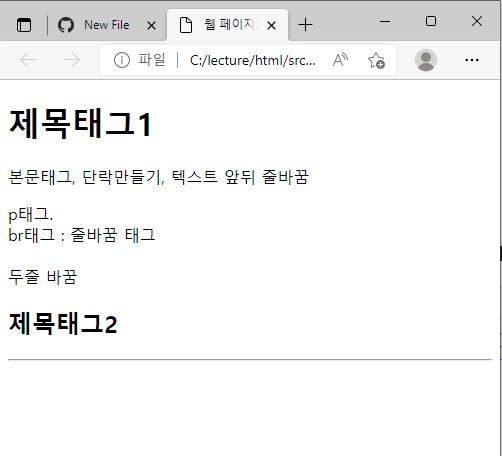
- p태그로 표시하는 텍스트 앞뒤에서 줄바꿈이 일어난다
- br태그 : 개행 태그
- hr태그 : 수평 줄 태그
<!DOCTYPE html><!--문서 유형을 지정-->
<html lang = "ko"><!-- 문서에서 사용할 언어 지정-->
<head>
<!--문서정보를 지정-->
	<title>웹 페이지의 제목</title>
</head>

<body>
<!--실제 화면에 보이는 문서 내용을 입력-->
	<h1>제목태그1</h1>

	<p>본문태그, 단락만들기, 텍스트 앞뒤 줄바꿈</p>
	<p>p태그. <br>br태그 : 줄바꿈 태그 <br><br> 두줄 바꿈</p>

	<h2>제목태그2</h2>
	<hr><!--수평줄태그-->
</body>
</html>
<!--주석-->
텍스트 태그
- 블록 태그
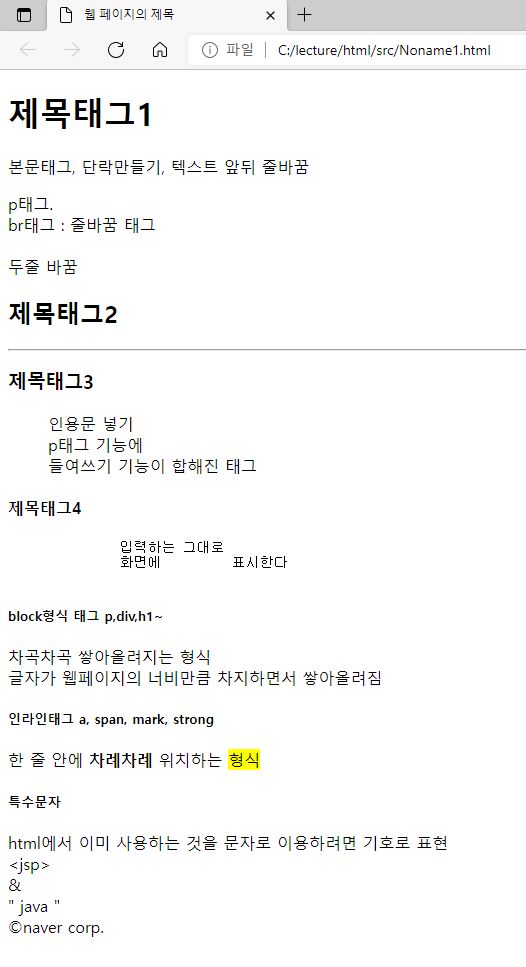
- 선택한 텍스트 글자에만 적용되는 것이 아니라, 텍스트가 포함된 블록 전체에 적용되는 태그
-
- 빈칸에 해당하는 html 특수코드
- html문서에서 띄어쓰기를 할 때 사용
- BLOCKQUOTE
- 인용문 넣기
- p태그의 기능에 들여쓰기 기능이 합해진 태그
- pre~/pre
- 입력하는 그대로 화면에 표시
- preformatted text의 약자
- 색상이나 모양을 변경할 수는 없다
- div
- 인라인 태그
- 태그를 적용해도 줄바꿈 없이 태그슬 사용한 영역에만 적용된다
- mark, time, strong, em, b, i, q, span 등
- mark
- 형광팬 효과
- background-color 속성을 사용해 배경색 변경 가능
- span
- 줄바꿈 없이 영역 묶기
- 태그 자체로는 의미 없음
- 단락 안에서 줄바꿈 없이 일부 텍스트만 묶어 스타일을 적용하려 할 때 사용
- 특수문자
<!DOCTYPE html><!--문서 유형을 지정-->
<html lang = "ko"><!-- 문서에서 사용할 언어 지정-->
<head>
<!--문서정보를 지정-->
<title>웹 페이지의 제목</title>
</head>
<body>
<!--실제 화면에 보이는 문서 내용을 입력-->
<h1>제목태그1</h1>
<p>본문태그, 단락만들기, 텍스트 앞뒤 줄바꿈</p>
<p>p태그. <br>br태그 : 줄바꿈 태그 <br><br> 두줄 바꿈</p>
<h2>제목태그2</h2>
<hr><!--수평줄태그-->
<h3>제목태그3</h3>
<blockquote>인용문 넣기<br>
p태그 기능에 <br>들여쓰기 기능이 합해진 태그
</blockquote>
<h4>제목태그4</h4>
<pre>
입력하는 그대로
화면에 표시한다
</pre>
<h5>block형식 태그 p,div,h1~</h5>
<p>차곡차곡 쌓아올려지는 형식<br>
글자가 웹페이지의 너비만큼 차지하면서 쌓아올려짐</p>
<h5>인라인태그 a, span, mark, strong</h1>
<p>한 줄 <span>안에</span> <strong>차례차례</strong> 위치하는 <mark>형식</mark></p>
<h5>특수문자</h5>
<p>html에서 이미 사용하는 것을 문자로 이용하려면 기호로 표현<br>
<jsp><br>
&<br>
" java "<br>
©naver corp.
</p>
</body>
</html>
<!--주석-->
앵커태그
- 하이터텍스트
- 사용자의 선택에 따라 특정 정보와 관련된 부분으로 이동할 수 있게 조직화된 문서
- HTML페이지가 조직화된 형태를 가질 수 있는 이유 : 앵커태그
- 앵커태그 (Anchor)
- 태그이름 : a
- 서로 다른 웹페이지 사이를 이동하거나, 페이지 내 특정 위치로 이동할 때 사용
- href속성
- target
- 링크로 연결할 문서가 실행되는 브라우저 창의 위치를 지정
- target을 지정하지 않으면 호출한 브라우저의 링크아 있는 창에 실행(_self)
- self : 현재창
- blank : 새 브라우저
- parent : 링크가 있는 문서를 호출한 부모 프레임
- top : 창분할이 있는 경우 분할을 무시하고 전체 프레임에
<!DOCTYPE html>
<html>
<head>
<meta charset="EUC-KR">
<title>Insert title here</title>
</head>
<body>
	<h1>a태그 앵커태그</h1>
	<p>서로다른 웹페이지 혹은 페이지내 특정위치로 이동</p>
	<a href="http://www.naver.com">네이버로 이동</a></br>
	<a href="http://www.naver.com" target="_blank">네이버로 이동 새창</a></br>
	<a href="test1.html">같은 폴더 내 test1 이동</a></br>
	<a href="../../jquery/dd.html">상위폴더, 상위폴더, jquery폴더 내 dd 이동</a></br>

</body>
</html>
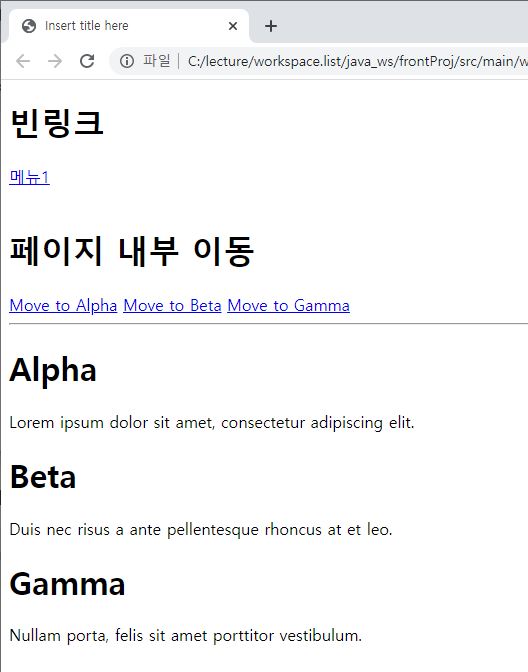
- 빈 링크
- a태그의 하이버링크를 제거하고 사용
- a태그에는 href속성을 반드시 입력해야 한다
- 이동하지 않는 a태그를 만들때는 #입력
- 페이지 내부 이동
- a태그를 이용, 현재 페이지 내부에서 원하는 장소로 이동
- 원하는 장소에 id속성 부여
- a태그 속성에 #아이디 형태의 문자열 입력
<!DOCTYPE html>
<html>
<head>
<meta charset="EUC-KR">
<title>Insert title here</title>
</head>
<body>
	<h1>빈링크</h1>
	<a href="#">메뉴1</a><br><br>
	<h1>페이지 내부 이동</h1>
	<a href="#alpha">Move to Alpha</a>
	<a href="#beta">Move to Beta</a>
	<a href="#gamma">Move to Gamma</a>
	<hr />
	<h1 id="alpha">Alpha</h1>
	<p>Lorem ipsum dolor sit amet, consectetur adipiscing elit.</p>
	<h1 id="beta">Beta</h1>
	<p>Duis nec risus a ante pellentesque rhoncus at et leo.</p>
	<h1 id="gamma">Gamma</h1>
	<p>Nullam porta, felis sit amet porttitor vestibulum.</p>

</body>
</html>
- 툴팁
- 링크로 이동하지 않아도 링크 내용을 미리 알 수 있다
- title 속성 이용
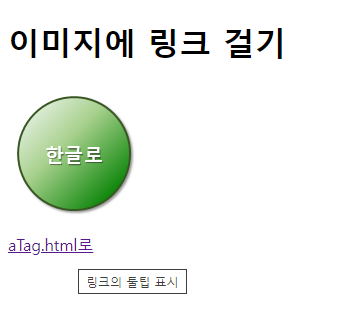
- 이미지 삽입
<!DOCTYPE html>
<html>
<head>
<meta charset="EUC-KR">
<title>Insert title here</title>
</head>
<body>
	<h1>이미지에 링크 걸기</h1>
	<a href="test1.html"><img src="../image/kor.png"></a><br>
	<a href="aTag.html" title = "링크의 툴팁 표시">aTag.html로</a><br>

</body>
</html>
글자형태
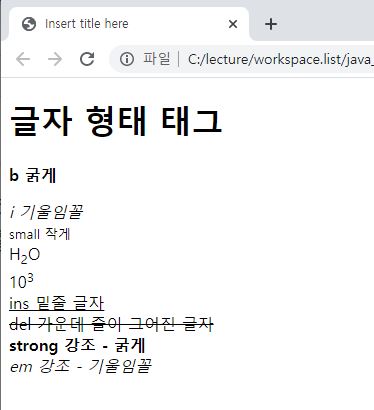
- b : 굵게
- i :기울임꼴
- small : 작은글자
- sub : 아래첨자
- sup : 위첨자
- ins : 밑줄글자
- del : 가운데 줄
- strong : 굵게
- em : 굵은 기울임꼴
<!DOCTYPE html>
<html>
<head>
<meta charset="EUC-KR">
<title>Insert title here</title>
</head>
<body>
	<h1>글자 형태 태그</h1>
	<p><b>b 굵게</b></p>
	<i>i 기울임꼴</i><br>
	<small>small 작게</small><br>
	H<sub>2</sub>O<br> <!-- 아래첨자 -->
	10<sup>3</sup><br> <!-- 위첨자 -->
	<ins>ins 밑줄 글자</ins><br>
	<del>del 가운데 줄이 그어진 글자</del><br>
	<strong>strong 강조 - 굵게</strong><br>
	<em>em 강조 - 기울임꼴</em>


</body>
</html>
3. 목록태그
- 내비게이션 메뉴 : 페이지를 이동할 때 사용되는 메뉴
- 목록태그를 사용하는 것이 일반적
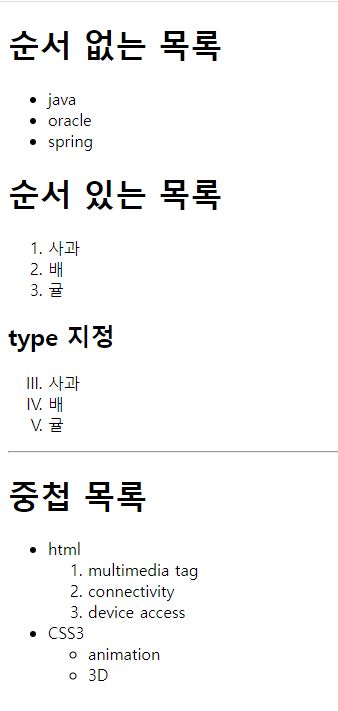
- ul : 순서가 없는 목록태그 (unOrdered list)
- ol : 순서가 있는 목록태그 (ordered list)
- type
- 1 : 숫자 123
- A : 알파멧 ABC
- a : 알파벳 abc
- I : 로마숫자 대문자 I II III
- i : 로마숫자 소문자 i ii iii
- li : 목록 요소 (list item)
<!DOCTYPE html>
<html>
<head>
<meta charset="EUC-KR">
<title>ulTest.html</title>
</head>
<body>
	<h1>순서 없는 목록</h1>
	<ul>
		<li>java</li>
		<li>oracle</li>
		<li>spring</li>
	</ul>
	<h1>순서 있는 목록</h1>
	<ol>
		<li>사과</li>
		<li>배</li>
		<li>귤</li>
	</ol>

	<h2>type 지정</h2>
	<ol type ="I" start ="3">
		<li>사과</li>
		<li>배</li>
		<li>귤</li>
	</ol>

	<hr>

	<h1>중첩 목록</h1>
	<ul>
		<li>html
			<ol>
				<li>multimedia tag</li>
				<li>connectivity</li>
				<li>device access</li>
			</ol>
		</li>
		<li>CSS3
			<ul>
				<li>animation</li>
				<li>3D</li>
			</ul>
		</li>
	</ul>

</body>
</html>
정의 목록
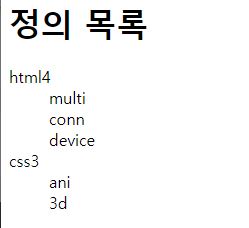
- 특정 용어와 그 정의를 표현할 때 사용하는 태그
- dl : 정의 목록 태그 (definition list)
- dt : 정의 용어 태그 (definition term), 제목
- dd : 정의 설명 태그 (definition description), 설명
<!DOCTYPE html>
<html>
<head>
<meta charset="EUC-KR">
<title>ulTest.html</title>
</head>
<body>
	<h1>정의 목록</h1>
	<dl>
		<dt>html4</dt>
		<dd>multi</dd>
		<dd>conn</dd>
		<dd>device</dd>
		<dt>css3</dt>
		<dd>ani</dd>
		<dd>3d</dd>
	</dl>

</body>
</html>
4. 테이블 태그
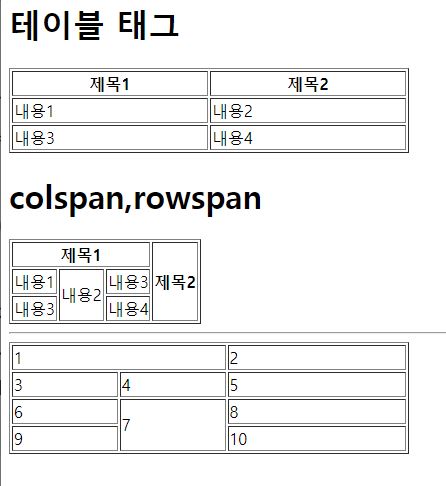
- 표를 만들 때 사용하는 태그
- tr : 표 내부의 행 태그 (table row)
- th : 행 내부의 제목 셀 태그 (table header)
- td : 행 내부의 일반 셀 태그 (table data)
- 속성
- 테이블 속성
- th, td 속성
- rowspan : 칸을 행으로 합치기
- clospan : 칸을 열로 합치기
<!DOCTYPE html>
<html>
<head>
<meta charset="EUC-KR">
<title>Insert title here</title>
</head>
<body>
	<h1>테이블 태그</h1>
	<table border = "1" style = "width : 400px">
		<tr>
			<th>제목1</th>
			<th>제목2</th>
		</tr>
		<tr>
			<td>내용1</td>
			<td>내용2</td>
		</tr>
		<tr>
			<td>내용3</td>
			<td>내용4</td>
		</tr>

	</table>
	<h1>colspan,rowspan</h1>
	<table border="1">
		<tr>
			<th colspan = "3">제목1</th>
			<th rowspan = "3">제목2</th>
		</tr>
		<tr>
			<td>내용1</td>
			<td rowspan = "2">내용2</td>
			<td>내용3</td>
		</tr>
		<tr>
			<td>내용3</td>
			<td>내용4</td>
		</tr>
	</table>
	<hr>
	<table border = "1" style="width:400px">
		<tr>
			<td colspan="2">1</td>
			<td>2</td>
		</tr>
		<tr>
			<td>3</td>
			<td>4</td>
			<td>5</td>
		</tr>
		<tr>
			<td>6</td>
			<td rowspan="2">7</td>
			<td>8</td>
		</tr>
		<tr>
			<td>9</td>
			<td>10</td>
		</tr>
	</table>
</body>
</html>
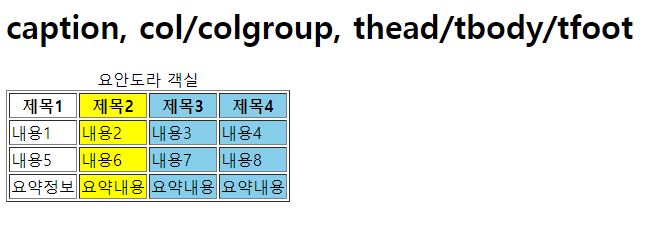
- 캡션 태그 (caption)
- 표에 제목 붙일 때 사용
- 표의 위쪽 가운데 표시
- table태그 바로 다음에 사용해야 하며 하나만 사용 가능
- caption 이나 summary 속성중 하나는 반드시 사용
- col, colgroup
- 여러 열 묶기
- 한번에 스타일을 지정 가능
- col : 한 열에 있는 모든 셀을 묶는다. 닫는 태그 없음
- colgroup : 여러개의 col태그를 묶을 수 있으며 span을 이용할 수도 있다
- tr,td 전 caption 다음에 사용
- col, colgroup 사용한 열의 개수가 전체 열의 개수와 일치해야 한다
- thead, tbody, tfoot
- 표의 제목, 본분 구분
- 표의 구조를 나누어 시각장애인들도 화면 판독기를 통해 표의 구조 이해 가능
- body 전에 head와 foot이 와야한다
<!DOCTYPE html>
<html>
<head>
<meta charset="EUC-KR">
<title>Insert title here</title>
</head>
<body>
	<h1>caption, col/colgroup, thead/tbody/tfoot</h1>
	<table border="1" summary="4인실과 2인실이 있으며 1인당 2만원입니다">
		<caption>요안도라 객실</caption>
		<col>
		<col style="background : yellow;">
		<colgroup span ="2" style = "background : skyblue"></colgroup>
		<thead>
			<tr>
				<th>제목1</th>
				<th>제목2</th>
				<th>제목3</th>
				<th>제목4</th>
			</tr>
		</thead>
		<tfoot>
			<tr>
				<td>요약정보</td>
				<td>요약내용</td>
				<td>요약내용</td>
				<td>요약내용</td>
			</tr>
		</tfoot>
		<tbody>
			<tr>
				<td>내용1</td>
				<td>내용2</td>
				<td>내용3</td>
				<td>내용4</td>
			</tr>
			<tr>
				<td>내용5</td>
				<td>내용6</td>
				<td>내용7</td>
				<td>내용8</td>
			</tr>
		</tbody>
	</table>

</body>
</html>
5. 이미지 태그
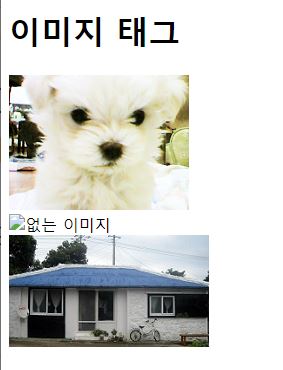
- 이미지 생성 시 img 태그 사용
- src : 이미지 경로 지장
- alt : 이미지 없을 때 나오는 글자 지정
- 시각장애인을 위한 리더기가 읽을 수 있는 텍스트
- 검색엔진에서 노출가능
- width : 이미지 너비 지정
- height : 이미지 높이 지정
- title : 툴팁 표시
<!DOCTYPE html>
<html>
<head>
<meta charset="EUC-KR">
<title>Insert title here</title>
</head>
<body>
	<h1>이미지 태그</h1>
	<img src = "../image/1.png" alt = "강아지 이미지"><br>
	<img src = "aa.jpg" alt = "없는 이미지"><br>
	<img src = "../image/1.jpg" alt = "집 이미지" title = "집이미지 타이틀" width="200"><br>

</body>
</html>
6. 오디오 태그
- 오디오 태그 (audio)
- src : 경로 지정
- preload : 음악 재생 전, 오디오파일을 모두 다운로드할 것인지 일부만 다운로드할 것인지 지정
- autoplay : 음악 자동 재생할지 지정
- loop : 반복할지 지정
- controls : 재생도구를 출력할지 지정
- 각 브라우저마다 지원하는 음악 파일 확장자가 다르다
- source 태그를 이용해 해결
- mp3파일과 ogg파일 둘을 제공하여 모든 브라우저에서 음악을 재생할 수 있게 한다
<!DOCTYPE html>
<html>
<head>
<meta charset="EUC-KR">
<title>Insert title here</title>
</head>
<body>
	<h1>오디오 태그</h1>
	<audio src = "../audio/Kalimba.mp3"></audio><br>
	<audio src = "../audio/Kalimba.mp3" controls="controls"
		autoplay = "autoplay" preload="auto"  loop ="loop"></audio>

	<hr>
	<audio controls="controls">
		<source src="../audio/Kalimba.mp3" type="audio/mp3">
		<source src="../audio/Kalimba.mp3" type="audio/ogg">
	</audio>

</body>
</html>
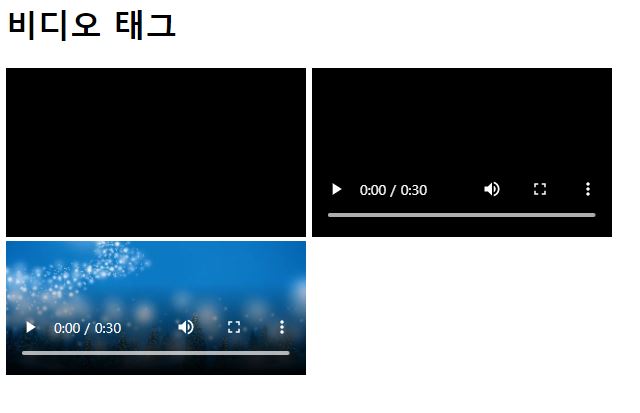
7. 비디오 태그
- src : 경로지정
- poster : 비디오 준비중일 때의 이미지 경로 지정
- preload : 재생하기전 모두 불러올지 지정
- autoplay : 자동재생여부
- loop : 반복재생 여부
- controls : 재생도구 출력 여부
- width : 너비 지정
- height : 높이 지정
- 비디오 태그 또한 브라우저마다 지원형식이 다르다
<!DOCTYPE html>
<html>
<head>
<meta charset="EUC-KR">
<title>Insert title here</title>
</head>
<body>
	<h1>비디오 태그</h1>
	<video src = "../audio/WildLife.mp4" width = "300"></video>
	<video controls = "controls" width = "300">
		<source src = "../audio/WildLife.mp4" type="video/mp4">
		<source src = "../audio/WildLife.mp4" type="video/webm">
	</video>
	<br>
	<video poster="../image/back2.jpg" controls="controls" width = "300">
		<source src = "../audio/WildLife.mp4" type="video/mp4">
		<source src = "../audio/WildLife.mp4" type="video/webm">
	</video>

</body>
</html>
8. 입력 양식 태그
- 사용자에게 입력받는 공간
- form태그 : 입력양식 생성
- input 태그 이용 입력
- action : 입력데이터 전달위치 지정
- 사용자가 입력한 값들이 지정한 서버페이지로 전송
- method : 입력데이터 전달방식 선택
- get : 주소에 데이터를 입력해 전송
- 주소 뒤에 데이터 노출
- 주소에 입력하므로 크기 한정
- post : 별도로 데이터 전송
<!DOCTYPE html>
<html>
<head>
<meta charset="EUC-KR">
<title>formTag.html</title>
</head>
<body>
<!--
	action속성 : 사용자가 입력한 값들은 action에 지정한 서버페이지 jsp로 전송됨
	method 속성
	1 get : 사용자가 입력한 값들이 url 주소의 뒤에 붙어서 전송
			보안에 취약, 최대 2kb
	2 post : 사용자가 입력한 값들이 http의 헤더 안에 숨겨져 전송
			보안에 좋음, 용량제한 없음 -->
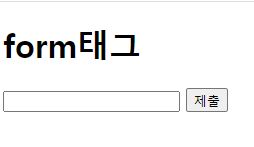
	<h1>form태그</h1>
	<form method ="get" action ="a.jsp">
		<input type ="text" name="search">
		<input type ="submit">
	</form>
</body>
</html>
- get으로 abc 전송시
- file:///C:/lecture/workspace.list/java_ws/frontProj/src/main/webapp/html/day1/a.jsp?search=abc
- post로 abc 전송시
- file:///C:/lecture/workspace.list/java_ws/frontProj/src/main/webapp/html/day1/a.jsp
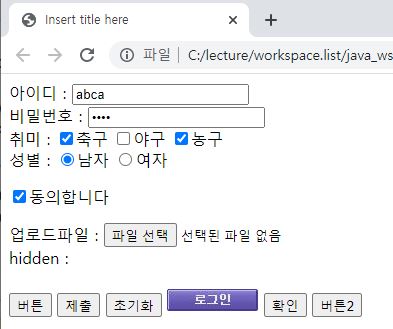
- 사용자에게 정보를 입력받는 기능 수행
- button : 버튼 생성
- checkbox : 체크박스 생성
- file : 파일 입력양식
- hidden : 숨김
- image : 이미지 형태 생성
- password : 비밀번호 입력 양식
- radio : 라디오버튼 생성
- reset : 초기화 버튼 생성
- submit : 제출 버튼 생성
- text : 글자 입력양식 생성
<!DOCTYPE html>
<html>
<head>
<meta charset="EUC-KR">
<title>Insert title here</title>
</head>
<body>
	<form method = "get" action="a.jsp">
		아이디 : <input type="text" name="userid"><br>
		비밀번호 : <input type="password" name="pwd"><br>

		취미 : <input type="checkbox" name="hobby" value="1">축구
			<input type="checkbox" name="hobby" value="2">야구
			<input type="checkbox" name="hobby" value="3">농구<br>

		성별 : <input type="radio" name="gender" value="M">남자
			<input type="radio" name="gender" value="F">여자<br>

		<p><input type="checkbox" name="agree">동의합니다</p>

		업로드파일 : <input type = "file" name="upfile"><br>
		hidden : <input type="hidden" name="age" value="20"><br><br>

		<input type="button" value="버튼">
		<input type="submit" value="제출">
		<input type="reset" value="초기화">
		<input type="image" src ="../image/login3.JPG">

		<button>확인</button>
		<button type = "button">버튼2</button>

	</form>
</body>
</html>
Label 태그
- input 태그를 설명하는데 사용
- input태그에 id속성 입력
- label 태그에 for 속성 입력
- input태그와 label태그를 연결
- 라벨 클릭시 연결된 input 태그 선택
<!DOCTYPE html>
<html>
<head>
<meta charset="EUC-KR">
<title>Insert title here</title>
</head>
<body>
	<form method = "get" action="a.jsp">
		<label for="id">아이디</label>
		<input type="text" id="id" name="userid"><br>

		취미 : <input type="checkbox" id = "hb1" name="hobby" value="1">
			<label for ="hb1">축구</label>

			<label>
				<input type="checkbox" name="hobby" value="2">야구
			</label>

			<br>

		성별 :
		<label>
			<input type="radio" name="gender" value="M">남자
		</label>

		<input type="submit" value="제출">
	</form>
</body>
</html>
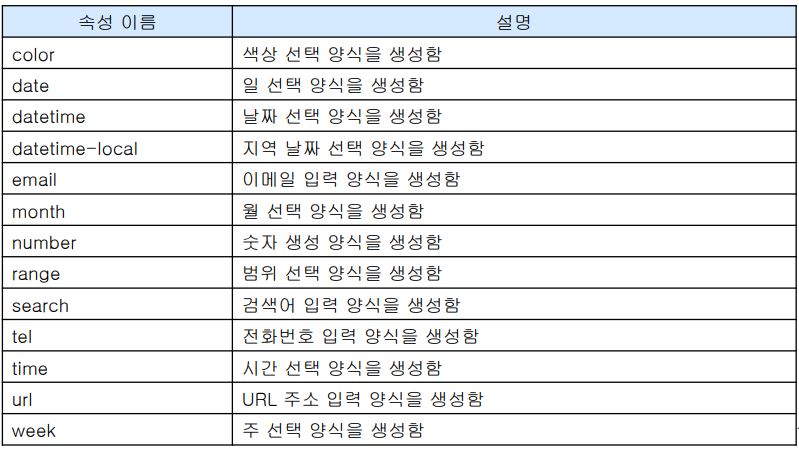
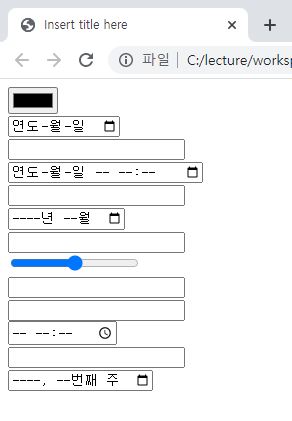
HTML5 입력양식 태그
<!DOCTYPE html>
<html>
<head>
<meta charset="EUC-KR">
<title>Insert title here</title>
</head>
<body>
	<form>
	<input type="color" /><br />
	<input type="date" /><br />
	<input type="datetime" /><br />
	<input type="datetime-local" /><br />
	<input type="email" /><br />
	<input type="month" /><br />
	<input type="number" /><br />
	<input type="range" /><br />
	<input type="search" /><br />
	<input type="tel" /><br />
	<input type="time" /><br />
	<input type="url" /><br />
	<input type="week" />
	</form>
</body>
</html>
textarea / select 태그
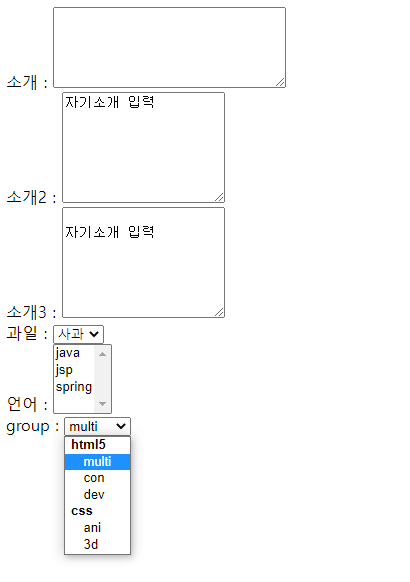
- textarea
- select
- 여러개의 목록에서 몇가지를 선택할 수 있는 양식
- select : 선택양식 생성
- optgroup : 옵션을 그룹화
- option : 옵션 생성
<!DOCTYPE html>
<html>
<head>
<meta charset="EUC-KR">
<title>Insert title here</title>
</head>
<body>
	<form method="get" action="a.jsp">
		소개 : <textarea rows="5" cols="30" name ="intro1"></textarea><br>
		소개2 : <textarea rows="7" cols="20" name ="intro2">자기소개 입력</textarea><br>
		소개3 : <textarea rows="7" cols="20" name ="intro3">
			자기소개 입력
			</textarea><br>

		과일 :
		<select name = "fruit">
			<option>사과</option>
			<option>딸기</option>
			<option>포도</option>
		</select><br>

		언어 :
		<select multiple = "multiple" name ="lang">
			<option value="1">java</option>
			<option value="2">jsp</option>
			<option value="3">spring</option>
		</select><br>

		group :
		<select name = "group">
			<optgroup label="html5">
				<option>multi</option>
				<option>con</option>
				<option>dev</option>
			</optgroup>
			<optgroup label="css">
				<option>ani</option>
				<option>3d</option>
			</optgroup>
		</select>
	</form>

</body>
</html>
fieldset, legend
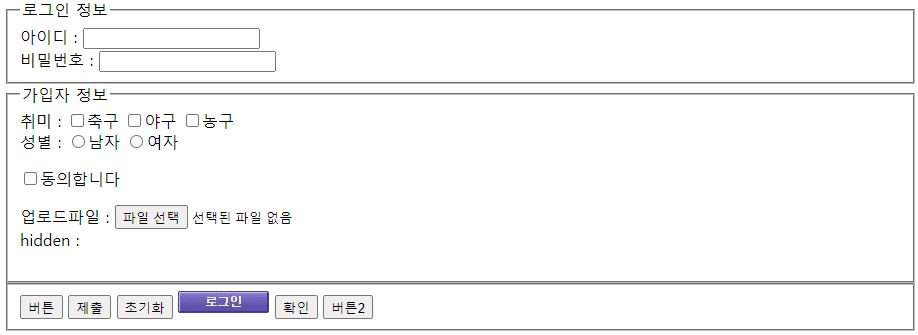
- fieldset
- legend
- fieldset으로 나누어진 구역에 제목을 붙이는 태그
<!DOCTYPE html>
<html>
<head>
<meta charset="EUC-KR">
<title>Insert title here</title>
</head>
<body>
	<form method = "get" action="a.jsp">
		<fieldset>
			<legend>로그인 정보</legend>
			아이디 : <input type="text" name="userid"><br>
			비밀번호 : <input type="password" name="pwd"><br>
		</fieldset>
		<fieldset>
			<legend>가입자 정보</legend>
			취미 : <input type="checkbox" name="hobby" value="1">축구
				<input type="checkbox" name="hobby" value="2">야구
				<input type="checkbox" name="hobby" value="3">농구<br>

			성별 : <input type="radio" name="gender" value="M">남자
				<input type="radio" name="gender" value="F">여자<br>

			<p><input type="checkbox" name="agree">동의합니다</p>

			업로드파일 : <input type = "file" name="upfile"><br>
			hidden : <input type="hidden" name="age" value="20"><br><br>

		</fieldset>
		<fieldset>
			<input type="button" value="버튼">
			<input type="submit" value="제출">
			<input type="reset" value="초기화">
			<input type="image" src ="../image/login3.JPG">

			<button>확인</button>
			<button type = "button">버튼2</button>

		</fieldset>
	</form>
</body>
</html>
기타 속성
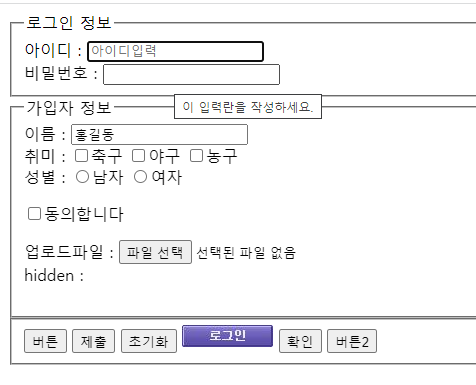
- readonly : 필드를 읽기전용으로 설정
- placeholder : 힌트 표시
- input 요소의 필드안에 힌트내용을 표시하고 있다가. 필드를 클릭하면 힌트내용 숨김
- autofocus : 입력커서 표시
- 페이지를 불러오자마자 폼의 요소 중 원하는 요소에 마우스 커서 표시
- required : 필수필드 지정
<!DOCTYPE html>
<html>
<head>
<meta charset="EUC-KR">
<title>Insert title here</title>
</head>
<body>
	<form method = "get" action="a.jsp">
		<fieldset>
			<legend>로그인 정보</legend>
			아이디 : <input type="text" name="userid" autofocus="autofocus" placeholder ="아이디입력"><br>
			비밀번호 : <input type="password" name="pwd" required="required"><br>
		</fieldset>
		<fieldset>
			<legend>가입자 정보</legend>
			이름 : <input type="text" name = "name" value = "홍길동" readonly="readonly"><br>
			취미 : <input type="checkbox" name="hobby" value="1">축구
				<input type="checkbox" name="hobby" value="2">야구
				<input type="checkbox" name="hobby" value="3">농구<br>

			성별 : <input type="radio" name="gender" value="M">남자
				<input type="radio" name="gender" value="F">여자<br>

			<p><input type="checkbox" name="agree">동의합니다</p>

			업로드파일 : <input type = "file" name="upfile"><br>
			hidden : <input type="hidden" name="age" value="20"><br><br>

		</fieldset>
		<fieldset>
			<input type="button" value="버튼">
			<input type="submit" value="제출">
			<input type="reset" value="초기화">
			<input type="image" src ="../image/login3.JPG">

			<button>확인</button>
			<button type = "button">버튼2</button>

		</fieldset>
	</form>
</body>
</html>
9. 공간분할 태그
- div : block 형식으로 공간 분할
- span : inline 형식으로 공간 분할
- 시멘틱 구조 태그
- semantic : 의미론적인
- 컴퓨터가 이해할 수 있게 공간 분할
- 특정 태그에 의미를 부여하여 웹페이지 제작
- header : 머리말 태그
- nav : 문서나 사이트를 연결하는 내비게이션태그
- aside : 본문 이외의 사이드바 영역 태그
- sectino : 여러 중심내용을 감싸는 공간
- article : 실제 콘텐츠 영역
- footer : 사이트 제작자나 연락정보가 포함되는 푸터태그
- div태그와 같은 기능을 수행
- 기계적인 동작들이 웹페이지를 쉽게 이해할 수 있도록 한다
div와 시맨틱태그 차이
div
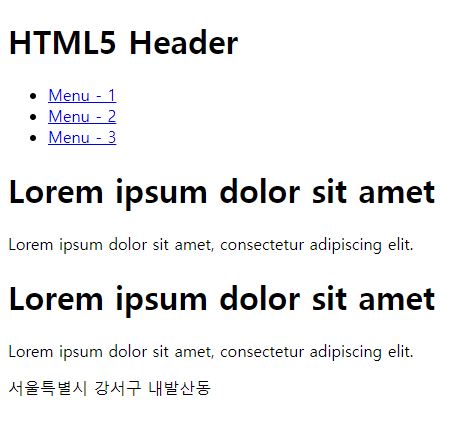
<!DOCTYPE html>
<html>
<head>
<meta charset="EUC-KR">
<title>Insert title here</title>
</head>
<body>
	<div>
		<h1>HTML5 Header</h1>
	</div>
	<div>
		<ul>
			<li><a href="#">Menu - 1</a></li>
			<li><a href="#">Menu - 2</a></li>
			<li><a href="#">Menu - 3</a></li>
		</ul>
	</div>
	<div>
		<div>
			<h1>Lorem ipsum dolor sit amet</h1>
			<p>Lorem ipsum dolor sit amet, consectetur adipiscing elit.</p>
		</div>
		<div>
			<h1>Lorem ipsum dolor sit amet</h1>
			<p>Lorem ipsum dolor sit amet, consectetur adipiscing elit.</p>
		</div>
	</div>
	<div>
		<span>서울특별시 강서구 내발산동</span>
	</div>
</body>
</html>
시맨틱태그
<!DOCTYPE html>
<html>
<head>
<meta charset="EUC-KR">
<title>Insert title here</title>
</head>
<body>
	<header> <!-- div -> header -->
		<h1>HTML5 Header</h1>
	</header>
	<nav> <!-- div -> nav -->
		<ul>
			<li><a href="#">Menu - 1</a></li>
			<li><a href="#">Menu - 2</a></li>
			<li><a href="#">Menu - 3</a></li>
		</ul>
	</nav>
	<section> <!-- div -> section -->
		<article> <!-- div -> article -->
			<h1>Lorem ipsum dolor sit amet</h1>
			<p>Lorem ipsum dolor sit amet, consectetur adipiscing elit.</p>
		</article>
		<article>
			<h1>Lorem ipsum dolor sit amet</h1>
			<p>Lorem ipsum dolor sit amet, consectetur adipiscing elit.</p>
		</article>
	</section>
	<footer> <!--  div -> footer -->
		<span>서울특별시 강서구 내발산동</span>
	</footer>
</body>
</html>
- header
- 머리말 지정하기
- 특정 부분의 머리말
- 사이트 전체 뿐 아니라 article의 제목이 될 수도 있다
- nav
- 문서를 연결하는 내비게이션 링크
- 메뉴부분에 많이 사용
- header, footer, aside 태그 안에 포함시킬 수 있다
- 독립해서 사용가능하다
- hn
- hgroup
- 제목과 부제목을 나타낼 때 묶을 수 있는 태그
- section
- 콘텐츠 영역을 구분짓는 용도로 사용
- 실제 콘텐츠 내용은 article을 이용해 표시
- article
- aside
- footer
- address
- 연락처 정보, 제작자 정보등을 나타내는 태그
- footer 태그안에 주로 사용
- div
- 주로 css를 적용할 때 사용한다
- 시멘틱트개들을 div로 묶어 스타일 적용


